How to Set Up an Exchange Server Account in Outlook?
Follow the steps mentioned below in order to configure Exchange Server Account in Microsoft Outlook.
Step 1. Open Control panel and click on "Mail" option. If you couldn't find the option then change the view of control panel to Large icons

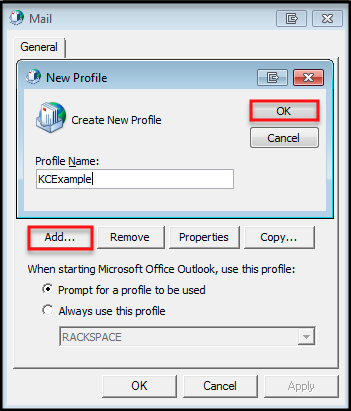
Step 2. Click on show Profiles, then click on "Add" button and from the New Profile dialog box appears enter profile name and click OK
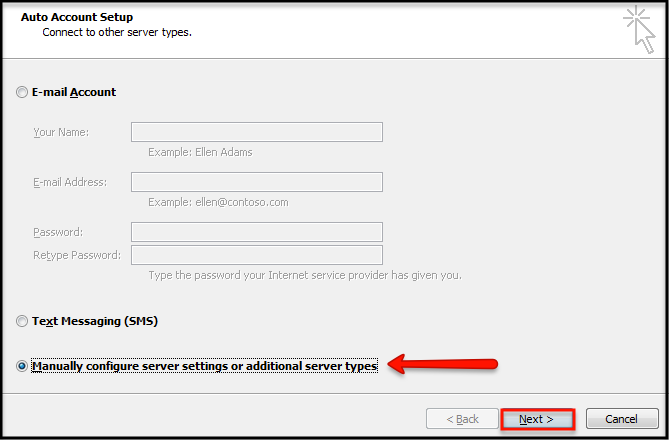
Step 3. Select "Manually configure server settings or additional server types" and click on Next
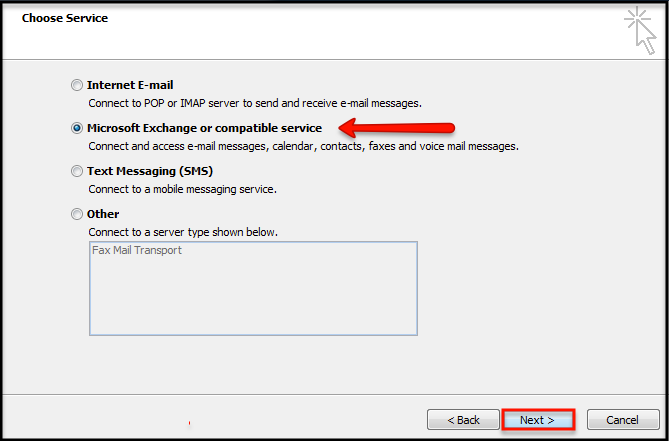
Step 4. Choose Microsoft Exchange and click Next
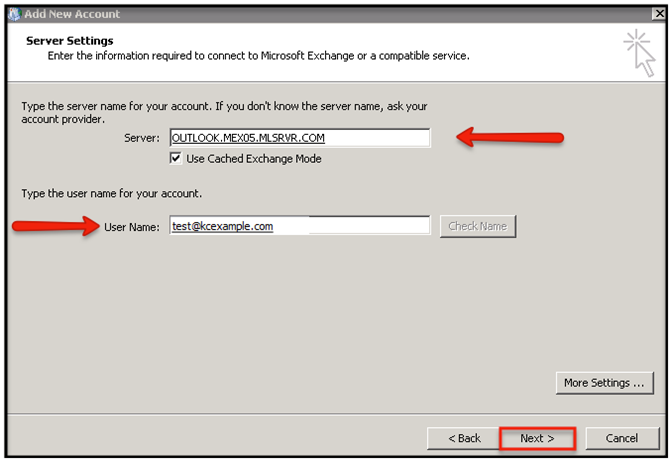
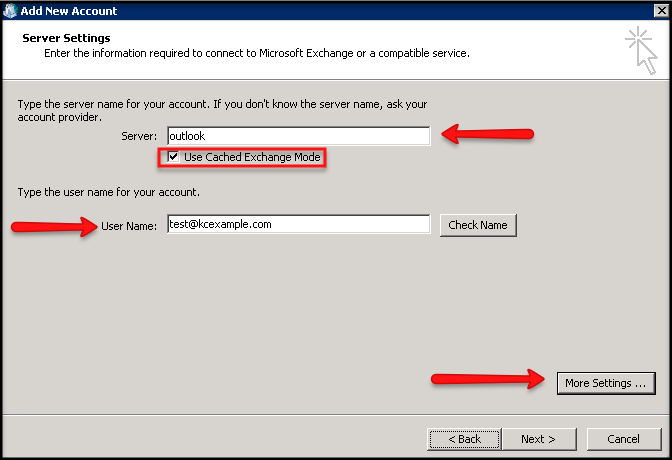
Step 5. In Microsoft Exchange Server field type Outlook and check mark Use Cached Exchange Mode and then type entire email address and then click on More settings
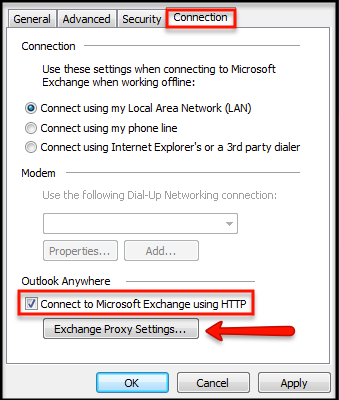
Step 6. Click on Connection tab and select Connect to Microsoft Exchange using HTTP
Click on Exchange Proxy Settings button
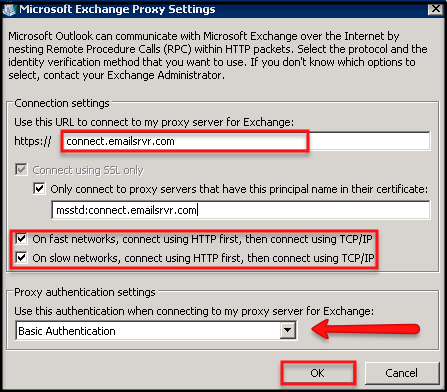
Step 7. Enter connect.emailsrvr.com as the proxy server for Exchange address
Check mark both the options – On fast networks & On slow networks.
In the Proxy authentication settings choose basic authentication as shown in the below image
Step 8. Click Ok, then Apply the changes, then click OK.
Select Check Name box in the Connect window. Type the password and click OK
Step 9. After then your name will be highlighted and it will appear with a underline in the username field, which indicates that your profile has been configured
Click Next, then Select Finish and then open Outlook